The kitchen Renovation
Our kitchen has gone through quite a few changes in the last 10 years, when we moved in to this house the kitchen was pretty much hideous, so bad I have no photos .... darkish pink colored walls with a wallpaper surround fringe, a "European" formica kitchen and formica counter tops, dark blue tiles that were ok but very chipped and a black sink, in short a mish mash dated mess! ! over the years we replaced the cabinets with white Ikea cabinets (love them and they are still holding up like new) we replaced the formica counter tops with the Ikea butcher wood counter tops and removed the top cabinets and put in open shelving. This all happened in 2007 and you can see the post about it in my old blog.
The kitchen went through many more changes since that blog post 8 years ago now but I was still not mad about the dark tiles and black sink, they made the room look smaller and dark.
After rethinking the renovation for months and on a very small tight budget we finally got around to it. We saved a ton of money by doing all ourselves and Ronen my sweet husband did all the work! everything! I just stood around and watched most of time and cleaned the mess and fed him. Our son Jonathan helped too when heavy lifting was needed.
So here is what we did:
1. Removed old dark chipped tiles, yeayy!
2. Speckled and Sanded the walls 5 times! until completely smooth with Easy Sand
3. Painted the walls, shelves and window trims with Olympic Ultra White
4. The counter tops were stained and had water damage, we don't actually cut on them so we decided to seal them, we used Waterlox products, 4 coats of sealer and one coat of Satin Finish, the results are amazing! you will need to this in a well ventilated space (we used our garage) and wait for 24 hours between each coat! it takes forever but well worth it.
5. We removed the old sink and replaced it with the Ikea DOMSJÖ Double bowl Farmhouse sink, I love this sink!!! it's beautiful and huge and very comfortable to work with.
6. Replaced the leaky faucet with a new one we found on sale.
7. We replaced the old low hanging dated light fixture with spots.
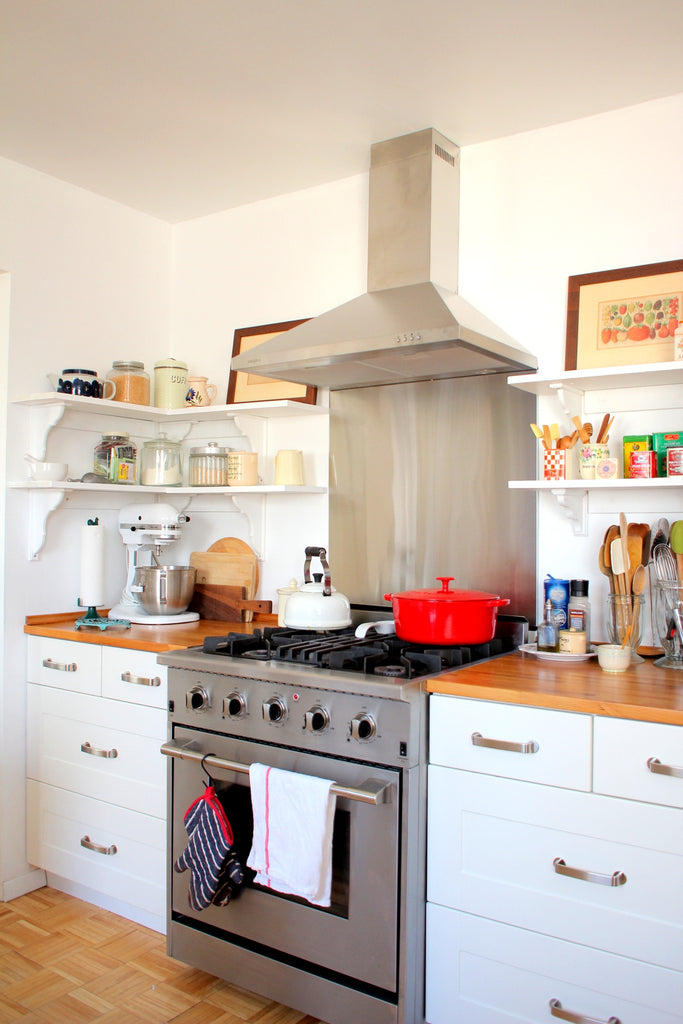
8. Since we removed the tiles behind the stove and our old range hood was not really functioning at all (I only used it for the overhead lights) we bought a new range hood at Costco with a matching stainless steel backsplash, I love how it looks and it's super easy to clean, we opted for the cheapest one and it works great!
9. Decluttering... I went for a much cleaner look this time and removed lots of my little chockas that were accumulating dust and completely un factional, I left everything I use on a daily basis, gave away some stuff, and kept some stuff for the kids future kitchens.
The overall look Before and After:

The new Range Hood and backsplash

The new Farmhouse sink and faucet
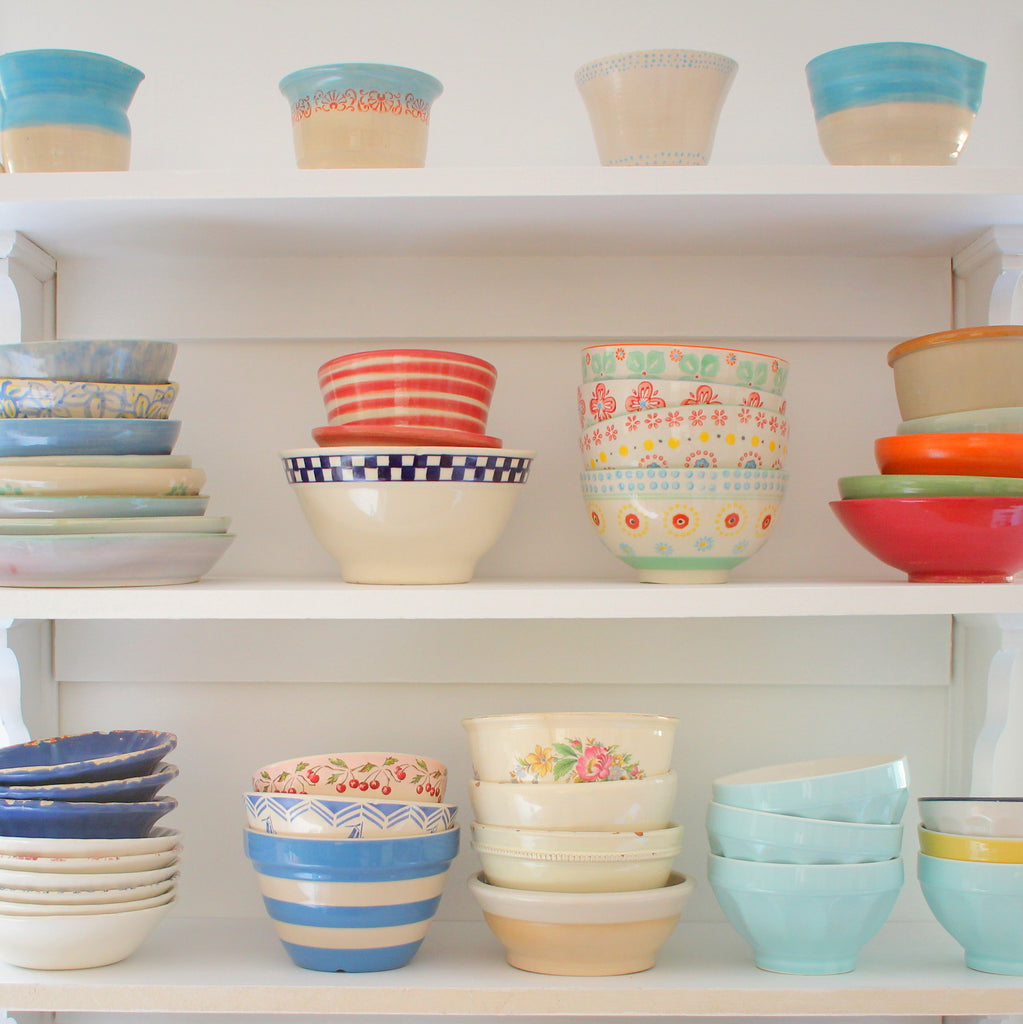
 some of our vintage plate collection
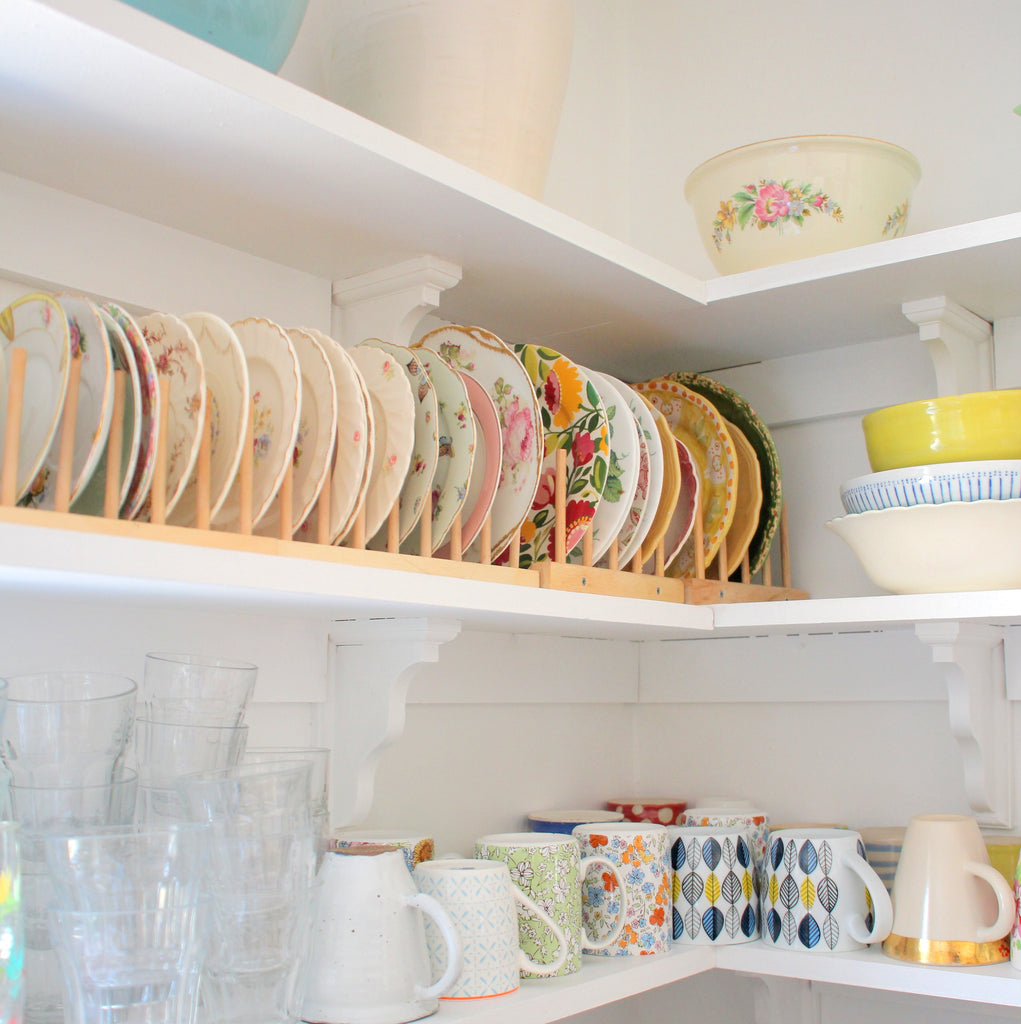
A new cleaner fresh look

the right side of the kitchen
our open shelf pantry in the back of the kitchen


Happy Spring! xox
3 Responses

Satyani
Wow!!!!! I love your kitchen! So envy your vintage collections, wish i could have those collections in my kitchen one day…

Alissa
I’ve seen some of these on Instagram, but how wonderful to see them bigger and brighter on the blog!! Beautiful renovation. Gosh…
Leave a comment
Comments will be approved before showing up.
© 2024 Nest Pretty Things.
Alice (Thrifted Treasure)
January 01, 2016
Love your kitchen! Literally everything about it!!!